Adding an external harddrive to a Raspberry Pi
We believe the native place for a server is in a datacentre and as such don’t run any infrastructure from our office. This caused us a small problem when testing new setups as we would sometimes need to build a new development server (locally in a virtual machine) and have to pull down all the ISO’s and packages needed. We have a fast internet connection but we are also impatient.
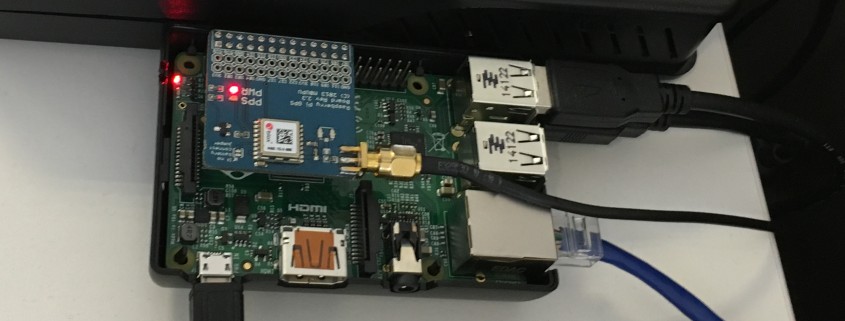
We needed a way to mirror the latest releases of the popular Linux distributions that we use so they are easily accessible for when we need them in the office. We decided that the best way to do this was to setup a script mirroring these popular repositorys on a Raspberry PI that we use for various things in the office.
We had a spare 1TB external harddrive that seemed like the perfect fit, and as it’s always best to start projects with a clean slate we did a full shred of the disk to make sure it was completely clean. This was done with the following command:
sudo shred -n 1 -z /dev/sda &
This performs a pass on the disk filling it with random bytes and then a second pass that writes 0’s to the disk.
The next step was to create some partitions on our disk, one of these we were going to use as swap space for the Raspberry PI and the other for storage of all our ISO’s we were going to mirror. We used fdisk to partition the disk and created two primary partitions, the first partition was 1GB of swap (it’s always better to make your swap partition first as it will be created on the inner sectors of the disk where the disk spins faster). The second partition was for our storage and used the rest of our available disk space.
After partitioning our disk we need to format the partitions accordingly, our storage partition was /dev/sda2 so we formatted it as ext4 with:
sudo mkfs.ext4 /dev/sda2 -L storage
And then mounted it as /mnt/storage with the following commands:
sudo mkdir /mnt/storage

sudo mount /dev/sda2 /mnt/storage
We now had around 1TB of storage under /mnt/storage that we could use to store all of our ISOs for easy access over the office network meaning we always have the latest and greatest versions at our disposal.
Finally to setup our Raspberry PI swap partition and enable swapping on it we did the following:
sudo mkswap /dev/sda1

sudo swapon /dev/sda1
We will also need to disable the standard Raspberry PI swap that uses the SD card with the following commands:
 sudo dphys-swapfile swapoff

sudo dphys-swapfile uninstall

sudo chkconfig dphys-swapfile off
The command:
sudo swapon -s
Will now show our new 1GB swap partition on /dev/sda1.
Finally we need to add some lines to our fstab file so the partitions are automounted at boot. We edited /etc/fstab and added the following lines:
 /dev/sda2 /mnt/storage ext4 defaults 0 2

/dev/sda1 none swap sw 0 0
Save that file and you should be all done! You can reboot to make sure that all of the partitions are automounted and that your Raspberry PI is now swapping on the new 1GB swap partition we made.


Trackbacks & Pingbacks
[…] Adding an external harddrive to a Raspberry Pi. Alex Last de Dogsbodytechnology.com […]
[…] We first came across the new Micro Bit 2016 at Over the Air 2015 when we instantly wanted one to play around with! The Micro Bit is not commercially available as yet…the BBC are considering selling it in the future which may help it be as popular as the Raspberry Pi . […]
Leave a Reply
Want to join the discussion?Feel free to contribute!